Cream Cheese Coffee Cake


A Quick and Easy Coffee Cake
Coffee cake...yum! My mother made this recipe when I was little before I even drank coffee. Come to think of it, I don't know that I have ever had it with coffee. I usually have it for dessert after dinner and I drink my coffee in the mornings. I will have to do something about that.
This recipe was written specifically for a raspberry cream cheese coffee cake but I have tried several different types of preserves and they are all good - blackberry or raspberry (with or without seeds), apricot, strawberry. Just pick your favorite.
There is nothing fancy about this recipe but I have found that sometimes the best recipes are the basic ones.
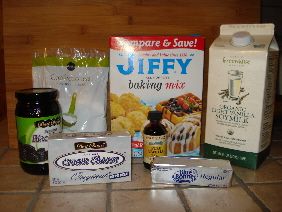
Ingredients
3 ounces cream cheese
4 T butter
2 cups biscuit mix
1/3 cup milk
1/2 cup preserves (raspberry, blackberry, apricot, pick your favorite)
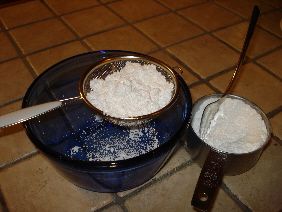
1 cup confectioners sugar
1 to 2 T milk
1/2 tsp vanilla
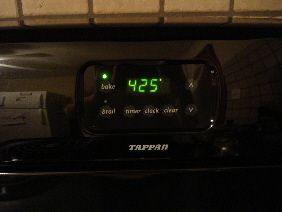
Preheat your oven
Preheat your oven to 425.
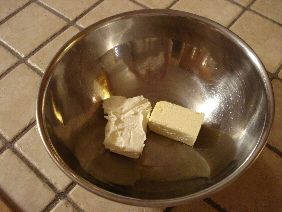
Soften Your Butter and Cream Cheese
It is easier to cut the butter and cream cheese into the biscuit mix if you let it sit out and soften first.
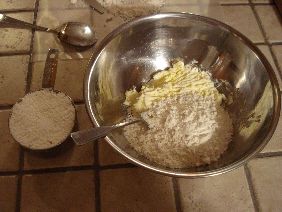
Start mixing
Cut the butter and cream cheese into the biscuit mix.
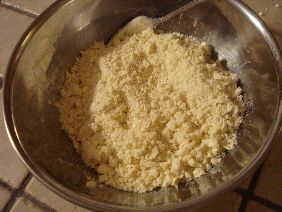
Texture
The texture should be crumbly when it is mixed.
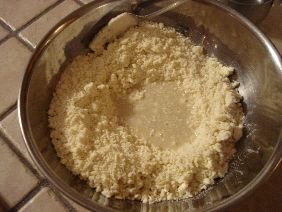
Got milk?
Add 1/3 cup of milk and stir.
I use soy milk because that is what I usually have at my house but the recipe was written for regular milk.
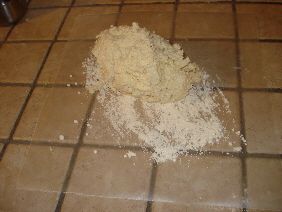
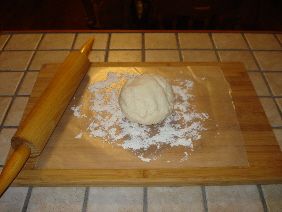
Knead the Dough
Transfer the dough to a floured surface and knead 8-10 times.
Use Your Wax Paper!
Transfer the kneaded dough to wax paper (sprinkle some flour or biscuit mix on the wax paper).
Wax paper? Who needs wax paper?
I like to simplify when possible so one time I decided to skip the wax paper and just roll the dough out on my counter. Worked fine until I tried to slide that 8 x 12 rectangle of soft dough onto my pan. The wax paper is crucial.
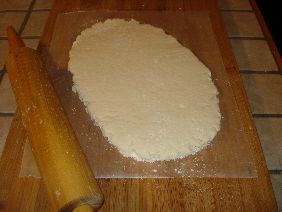
Roll out your dough
The rectangle should be roughly 12 x 8 inches. It doesn't have to be a perfect rectangle (as demonstrated by my picture).
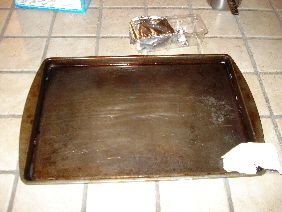
Grease your pan
I use Crisco, butter, margarine, bacon grease - whatever I happen to have.
This time I used Crisco.
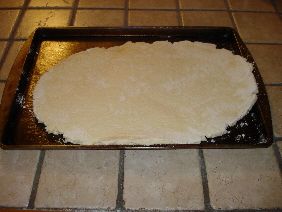
Get that dough on the pan
After rolling out the dough, I flip the pan upside down over the dough and slide my hand under the wax paper while trying to hold the sides of the wax paper to try to keep everything flush with the pan. Then just flip everything over very quickly so the dough doesn't have a chance to escape. It's not always a pretty process but the end result is your rolled out dough on the pan in one piece.
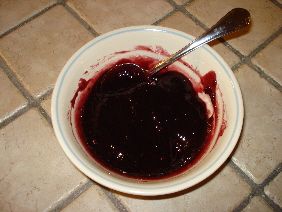
Work your preserves
The first few times I made this, I had trouble spreading the preserves on the dough. The preserves were stiff and the dough was soft. I now measure out my preserves, put them in a bowl, and stir them with a spoon until the consistency is thin enough to spread. Works much better.
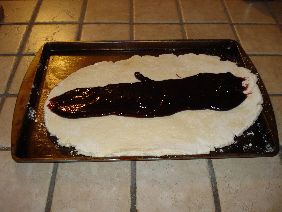
Spread those preserves
Spread the preserves down the middle third of the rectangle. It looks kind of questionable at this point but it all turns out okay.
These are seedless blackberry preserves.
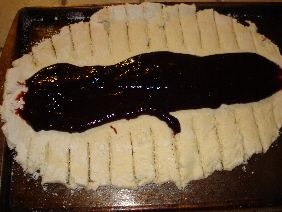
Make your cuts
Cut the dough into strips about an inch wide and almost to the preserves.
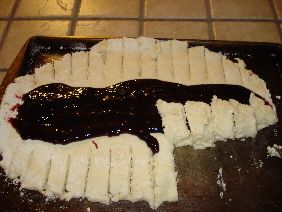
Fold your strips
Fold the strips over the preserves. Do all on one side and then turn the pan around and fold the strips up from the other side.
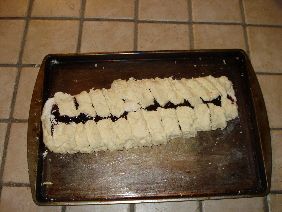
Ready for the oven
Depending on how wide your strip of preserves is, the strips may or may not meet in the middle.
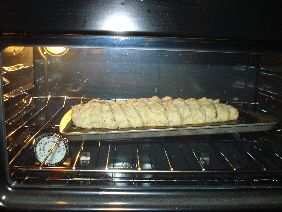
Now it's ready for the oven. Put the pan in the preheated 425 degree oven and bake for 12 to 15 minutes.
Don't forget the frosting!
What's a coffee cake without frosting?
While the coffee cake is baking, mix up that frosting!
I sifted the confectioners sugar but it is not necessary. It just keeps me from having to smooth out so many lumps later.
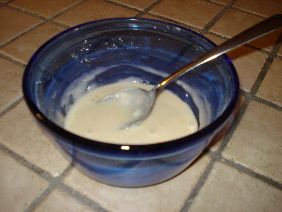
Mix 1 cup confectioners sugar, 1/2 teaspoon vanilla extract, and 1 to 2 tablespoons of milk.
The Sweet Stuff
I made the mistake (are you seeeing a pattern here?) of adding 2 tablespoons of milk to the sugar automatically. Too runny. There is a reason there is a range in the amount of milk. Start with 1 tablespoon and check the consistency. Then you can add more milk if needed. Really, there is no right or wrong. You can make it however thin or thick you like but it is supposed to be drizzled over the coffee cake so you want a consistency that will drizzle.
One thing I have noticed when I use soy milk is that the frosting has a tendency to separate a bit. Still tastes fine, though.
You also might laugh at the amount of icing you end up with. I actually wondered if I should double the recipe. Once I started drizzling, I found out it went a long way. There was more than enough icing. (But if you want more, go for it!)
Is it done yet?
After 12 minutes, check the coffee cake. It's done when the dough starts to look dry and brown on the edges (like a biscuit).
Apparently my pan is warped. Oh well, baked up just fine.
Cool down
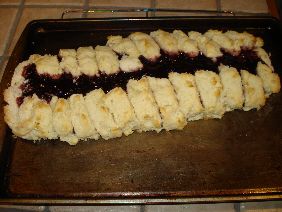
Take the coffee cake out of the oven and let it cool off.
Check out those brown edges.
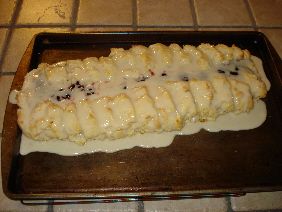
Frosting time!
Drizzle the frosting over the coffee cake.
I usually wait until the coffee cake is almost completely cool before I frost it. The heat will make the frosting run right off if it is too warm.
This particular coffee cake was apparently still pretty warm because a lot of the frosting ran onto the pan.
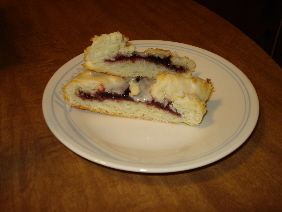
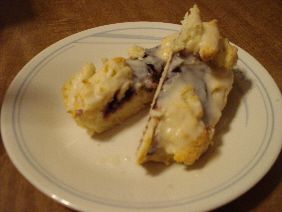
Grab a fork
Slice it up and dig in!
Ingredients
- 3 ounces cream cheese
- 4 T butter
- 2 cups biscuit mix
- 1/3 cup milk
- 1/2 cup preserves
- 1 cup confectioners sugar
- 1 to 2 T milk
- 1/2 tsp vanilla
Instructions
- Preheat oven to 425.
- Cut cream cheese and butter into biscuit mix.
- Mix in 1/3 cup milk.
- Turn dough onto floured surface.
- Knead 8-10 times.
- Roll to 12 x 8 rectangle on wax paper.
- Transfer onto greased baking sheet.
- Remove wax paper.
- Spread preserves down middle third of dough.
- Cut strips in the dough about 1 inch apart almost to the preserves.
- Fold strips of dough over the preserves.
- Bake at 425 for 12-15 minutes.
- Remove from oven and let cool completely.
- Mix confectioners sugar, milk, and vanilla. Drizzle over the coffee cake.


 Coffee Cake Recipe")


